Showing posts with label AAR. Show all posts

Thursday, 7 April 2016

Roamin' on the Gloamin' AAR

This was the last of the play test for the Roamin' on the Gloamin' free scenario and the battle was fought between father and son.


Ray took the Taliban, you can see his Taliban Scowl in the pic and and Michael the Black Watch Scots who apparently play by Marquis of Queensberry rules.

The game board looked like this:


The game began with the Taliban but as the Scots weren't on the board they passed on several combat phases until the 'dour' Scots turned up.

First Scots man up came on the board and secured his position in cover:


Meanwhile on the bridge the Taliban are trying to spot in the dark. This proved very difficult.


It didn't matter how hard they tried only having one man with NVG  made the Taliban spotting needing 01's to find the enemy.

Several more turn elapse and now a few more Scots had turned up.


Activate on the bridge now grew frantic but the Al Qaeda operative somehow couldn't get his NVG goggles to work. Finally more by luck than judgement one of the Scots was spotted and shot at. 


A hit, first blood to the Taliban but still the calm Scots, held their fire and found their targets in the dark. 


The Scots bring up their GPMG to cover the bridge and still they refuse to shoot. 


The view from the GPMG position


By now the sniper in the main Taliban building is doing everything he can to find and shoot at the Scots, but a series of unfortunate rolls leaves the Scots well protected.


The Scots now fire there 40mm grenade at the group on the bridge and hit spot, its kills 2 outright and the other two now have to have morale rolls at -30%.


Taliban on the left hand building move up in position to try and spot the Scots in the dark but again to no avale, the night time rules make spotting incredibly difficult without NVG, just as they should.


Finally the British Leader steps up and calls in the off table Warrior. He rolls the perfect score and the Warriors Chaingun wipes clear the roof.


It probably looked something like this.....


However the Scots weren't having it all their own way, one brave young man runs forward to help his injured friend and perform first aid in attempt to evacuate the casualty, the Taliban sniper see him and shoots, scratch our Hero.


Shortly after this, incensed by the deaths of his comrades the Scots Marksmen finds the Taliban sniper and after a few attempts 'slots' him.


Now the Scots rushed the bridge. One Taliban behind the end of the wall found a Scot armed with a combat shotgun, it didn't end well. The Scots now occupied the southern end of the bridge.


This was quickly followed up by more Scots


Unfortunately that's where we had to call the game but the Scots now occupied the southern end of the bridge, the Taliban had taken lots of casualties and were trying to get their novices to move up without two much luck. A series of Taliban took to their heels in this the last combat phase of the game.

So a good victory for the Scots. Its an interesting game playing a nighttime advance and means you have to change tactics. Have a go and let us know how you got on?


Saturday, 6 February 2016

Platoon+ test games

Platoon+

So we continue with our Platoon+ testing. This time we added off table resources. The Taliban had a mortar and a sniper and the ISAF had a heavy weapons team which included 2 Javelins and a sniper.

The ISAF platoons consisted on 1 Platoon of US Army and 1 Platoon of French. This was mainly to help us test the differences in national Platoon types and the Taliban had 25 minis.

The board looked like this.
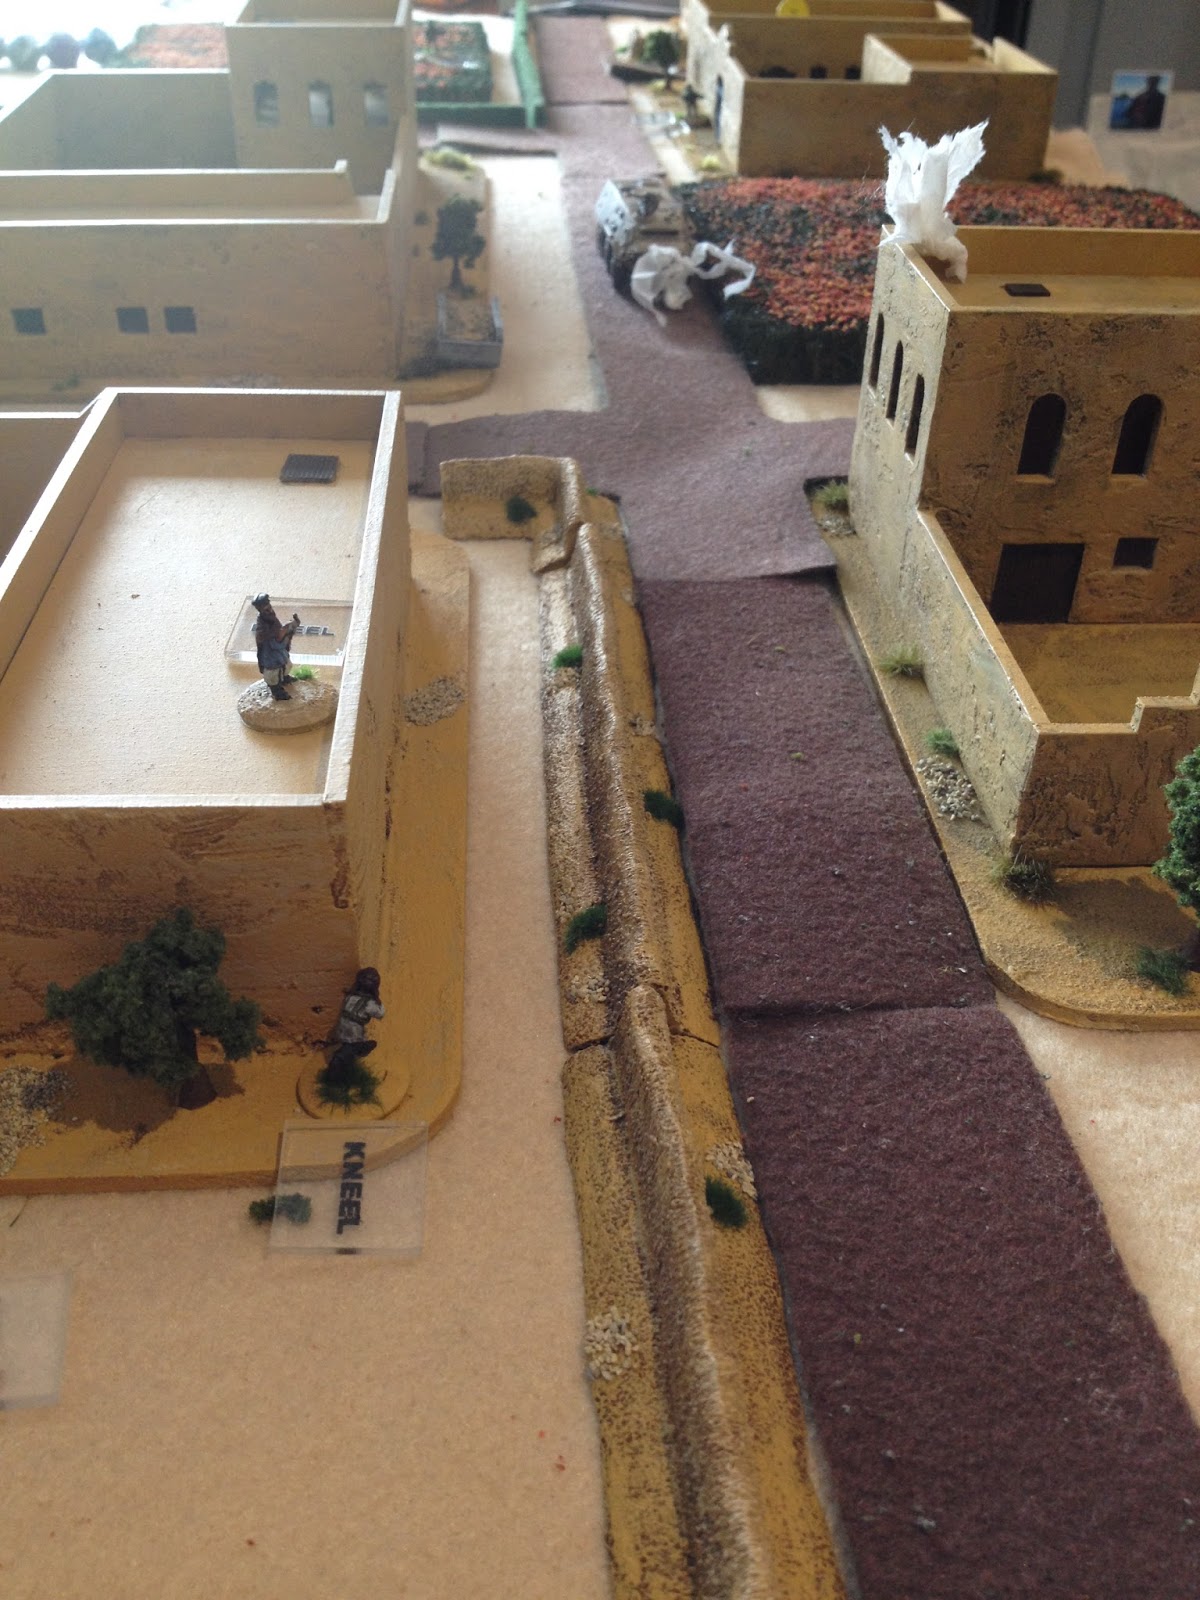


The Taliban held everything south of the river with ISAF coming from the north of the river. The Taliban were embedded in the village of Ghorak having in the scenario taken possession of the town the day before.

The battle unfolded with the ISAF advance. Its was a two prong approach designed to split the Taliban fire, this worked very well. The Taliban, dug in the building were initially a tough nut to crack with the French being pinned down on the left flank (bottom right of the pic below).


The Taliban used the banks of the stream as cover as they tried to bring fire on to the face arriving Americans.


The French hunkered down over the continual fire from the Taliban. The advanced initially brought to a stop. Here the first casualties went to the Taliban withering fire.


 The Taliban occupy the mosque and gain the high ground advantage (Sorry about the pic quality).


US army below make it to the first compound to find it empty.


The Americans charged the dug in Taliban along the river line and a fearful hand-to-hand battle begins. This would go on for most of the game with the Taliban taking casualties but refusing to yield. Ray (pictured) wanted to test the hand-to-hand rules and his Taliban held up well.


The French move up through the poppy field and come under off table mortar fire, twice they were hit and twice the dice (6d20) yield no casualties, but it did shake them up. The US employed both javelins but were such bad shots they missed their targets and inflicted only minor damage.


 Eventually the Taliban Morale breaks and the survivors bolt.


So just like before we have learned a few things and we have added more elements to the game I can honestly say I like where this is going. Both of my play testers liked it too. Once more of the rules are written up in a more cognitive form I will be looking for more play testers, so let us know if your interested.

The game took 2 hours and 15 minutes with high Taliban casualties but ISAF were pinned for a number of rounds, which stopped there advance dead for a while.

The larger playing area really worked too.


Wednesday, 23 September 2015

Sweep and Clear- AAR

Right, finally we are back in the groove, and can play some AARs!

Craig H and Colin came over to my place, to play the Sweep and Clear scenario, using the excellent 15mm Flytrap Miniatures, and on terrain from Gamecraft Miniatures .

This was the first time playing 15mm for Colin and Craig, and it went pretty well. Colin took charge of the Grey Pashmina and his forces, while Craig and I took a squad of Panzergrenadiers each, as well as their Fuchs armoured vehicles.


Looking down the German lines of advance, the table looked like this:

The Taliban were in defensive positions, waiting for the German arrival.


My Germans took the left hand flank, while Craig's squad advanced up the right hand flank.

My Fuchs rolled on, and quickly the infantry dismounted into cover:

Once my Germans dismounted, they immediately came under small arms fire from the rooftops

Luckily, the grenadier returned fire with his AG36, dropping a 40mm directly on the firing point!

Scratch one Taliban, first blood to the Germans!

Meanwhile, Craig was taking his Fuchs on a merry ride through the village

He dismounted his grenadiers, and began to search the mosque for the Grey Pashmina.

This was about the point where our advance all went wrong.

The Taliban began to swarm out of their hidey holes

And as Craig's Fuchs rounded the corner, it immediately got an RPG round straight through the front, completely destroying the vehicle!

The destruction of the Fuchs immediately pinned Craig's advance (it didn't help him that his morale rolls completely deserted him)

Seizing the advantage, the Taliban surged forward, trying to push the Germans back and catch them in a crossfire along both flanks

My squad was bogged down too, pinned in place by PKM fire. The Fuchs drove up to act as a blocker between the PKM and the Germans. Unfortunately, the plan went awry when the PKM put holes in the front of my Fuchs, destroying it!

The Taliban then started to swarm out of other bolt holes, effectively pinning both German squads in place. My forces took to the poppy fields for cover, engaging the Taliban.

Craig's MG gunner sought the high ground, trying to hunt the Taliban on the rooftops. Craig's dice had deserted him by this point, requiring THREE turns to hit the Taliban on a 90%. At that point, you know you are not having a good day with dice...

My attempt at getting to the high ground resulted in my Obergefreiter killing one Taliban, and getting shot and killed in return.

And at the end of the second combat turn, it was a clear Taliban victory, and time to call it a day.

The net result? The Germans lost two Fuchs and three soldiers killed. The Taliban lost 10 of their fighters, but crucially the Grey Pashmina escaped. Colin played the game well, as we have come to expect from him!

Sources indicate this is the Grey Pashmina, but the Germans never got close enough to confirm!

And as for the Germans, we really paid the price for not bringing in the Show of Force. Remember kids, if you have an asset to use in the game, never save it for a rainy day. We needed to use the show of force early, so that the Taliban heads were down, and were unable to snap fire on our advance. That way we would have gotten further up the table, before getting caught in the fire from the Taliban. It might have even kept our two Fuchs alive!

So all up, an interesting and challenging game. Now I know we are months behind with playing our free scenarios, so we are already planning the next game.

Oh and I had better get writing the next free scenario!

Chris

Sunday, 8 February 2015

Cut Off - Free Scenario and AAR

CUT OFF

As part of completing Despatches II, we had a raft of articles that just didn't quite make the final book, due to us reaching the maximum page numbers way earlier than we expected. When you write any book as a team there are always favourite articles that get left behind. Articles that while great just don’t make the cut because we reach the maximum page count way before we wanted too. This of course has led us to believe we will create Despatches III.

However as this is scheduled for the fourth quarter of 2015 we couldn’t wait that long to show you, our loyal readers, some of the cool things we wrote so we have decided to release a new scenario every month. These scenarios will be PDF only of course but we hope it will give you something to look forward to, while waiting (patiently!) for the next Despatches.

 The first of these scenarios is Cut Off. The original ideas was Chris’s but as with everything Sangin, it did a round robin to fill it out and shape it into the great scenario it is now. Nothing in Sangin is a one-man operation but this scenario was definitely one of Chris’s favourites and it fair to say he politicked hard for it to be the first scenario.

 Each scenario when released will have an AAR played to go with its release, as we know everybody enjoys them and to show you how our games go.

(NOTE) In this and all of our scenarios to date, we do not write "balanced" scenarios in the traditional wargamer sense. Our scenarios tend not to be a X hundred points vs X hundred points battles, because in reality forces are never balanced. Instead they are designed to be a challenge for both players. This month's scenario is no exception, it is a tough game for both players, there are no easy wins here!

Forces
Colin took the Insurgent forces (All Sangin figures) and fielded some beautifully painted figures by our good friend Ray who has been one of our chief play testers in SD 1 and 2.

I really wish I could paint that well!

Chris took the role of ISAF using our Australian figures that he had painted himself, again a terrific paint job, so much eye candy in this game. We will have a closer look at those figures next week.


As you can see from the board we set up pretty much as described in the scenario but using the terrain we had. The Taliban started on table and hidden, so they had all the advantages to start with, but they had neither numbers or skills in this game so would need every advantage to swing this one.


Hiding in the corner fields and on top of buildings the Taliban made best use of their home ground knowledge to select the best cover.


This was a Taliban ambush so they decided to make the most of it. They were bunkered down and waiting, knowing through the village grapevine that the enemy was approaching.


So the first Australian entered the board, scouting the route out, walking carefully looking for the Terries. He didn't spot any, but they did spot him and one lone gunman opened fire, springing the trap too early.

(Below)  The Australian responded with a 40mm grenade which while missing his target on the roof, caught a Taliban hiding in the cornfield that he didn't even know existed. Injuring him slightly and really shaking him up.


(Below) The shooter who sprung the Ambush early I am sure if he survives there will be strong words from his playmates.


(Above)  The next Aussie seeing how effective grenades were, even when they miss, decides to throw his own. While on the right flank other members of the team begin to make there way through the fields.


(Below) The Australians used a three prong attack, probing the ambush to try and find its weak point.


(Below) With the sound of gun fire, the patrol firing and manoeuvring, although so far on the right flank they had not spotted the insurgents.


(Below) The Bushmaster ( A great model from our friends at Company B) drives on the board and realises all is not well with what they thought was a standard pick up operation.


(Below) The HMG sings out and manages to kill a Taliban but unbeknownst to the vehicle team they are being hunted by an insurgent with an RPG. Meanwhile the left prong of the Australians  are still lobbing grenades at the insurgents trying to force them out of the building.


Which a whoosh of rocket engine the RPG ploughs into the Bushmaster. The Insurgents  abilities wasn't high but the target was just too big and the penetration too good that when we rolled on the penetration chart the vehicle was totally destroyed. Scratch one Bushmaster!


Colin insisted on several picture of this as it was major victory for the Taliban. The Australians are never ones to back down from a fight nor take things lying down, so returned with withering fire from a wide selection of weapons. Unfortunately at this points the Insurgents brought their PKM to bear, swiftly followed by their sniper, and casualties began to mount on both sides.


(Below)  Chris' Australians seem to have an affinity with grenades.


(Below) Casualties mount in the cornfield. For this game we ignored the MEDEVAC rules in the wound chart.


(Below) The Australians realising they needed to take control of the roof tops as they where being cut down in the corn fields began roof to roof clearances with their usual effectiveness.


(Below) This grenade forces the sniper to bolt. But the PKM keep up its monstrous fire.


At this point after one action packed combat turn we called the game. Casualties were 5 Taliban to 4 Australians but to be far to Australians they were just beginning to bring there heavy weapons to bear although time was definitely not on their side. They had succeeded in driving off the sniper but the PKM was still wreaking havoc in the cornfield. At this point it was a victory to the insurgents.

You can download the scenario from this link and feel free to send us your AARS, we would love to see how you tackled this game can you do better than us? Having played this through once there lots of thing we could both have done better but having had a 6 week break we were both a bit rusty on the old thinking. I am sure we will be far more tactically astute for next months scenario!

Cheers and enjoy,

Colin and Chris.